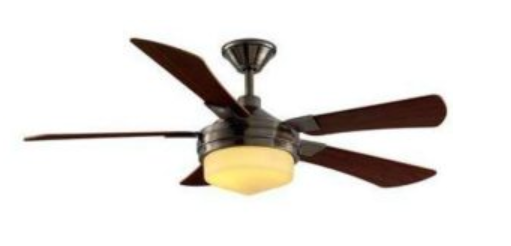
Welcome to the page dedicated to the Hampton Bay Covington Ceiling Fan! Here, you’ll find a lot of information about the Covington fan, including the manual, as well as other valuable details to assist our site visitors. If you can’t find the information you’re looking for, remember to consult the manual, as it is the best resource to start with.
We try our best to provide as much information as possible about the Covington Fan to ensure a good experience for our visitors. However, if there’s any missing information that you require, please don’t hesitate to leave a comment. We carefully review all comments for accuracy, and if there’s any resource or detail lacking, we’ll make every effort to add it to the site as early as possible.
Hampton Bay Covington – Specs
Fan Model: Hampton Bay Covington 54″
UL Model No : 54-cvt
UPC 082392610203 (gunmetal finish)
Blade span: 54 inches
Remote control: Yes, added
Light kit: Yes, added
Finish: Gunmetal

Installation Guide for Hampton Bay Covington Ceiling Fan
Before you start the installation process, ensure you have all the necessary tools and equipment ready. The tools you are going to need are a screwdriver, wire stripper, pliers, ladder, and a voltage tester. For safety reasons, turn off the power to the circuit you’ll be working on at the main electrical panel before proceeding.
Step 1: Assemble the Fan
Begin by unpacking the contents of the box and laying everything out on a clean, flat surface. Locate the instruction manual and thoroughly review the installation steps to ensure you understand the process. Start by attaching the fan blades to the motor housing, followed by mounting the bracket securely to the ceiling.
Step 2: Installing the Mounting Bracket
After that, proceed to install the mounting bracket onto the ceiling using the provided screws. Ensure a secure attachment of bracket to the ceiling as it will be responsible for supporting the fan’s weight.
Step 3: Wiring the Fan
Once the mounting bracket is in place, start the wiring process for the fan. Use wire strippers to remove insulation from the fan wires, and then connect them to the corresponding wires in the electrical box. Match the wire colors accordingly (white to white, black to black, and green to green), and use wire nuts to securely fasten the connections.
Step 4: Attaching the Fan to the Mounting Bracket
With the wiring complete, you can move on to attach the fan to the mounting bracket. Lift the fan motor and align the motor holes with those on the bracket. Insert the provided screws and tighten them until the fan is securely affixed in place.
Step 5: Attach the Fan Blades
Once the fan motor is firmly in position, it’s time to attach the fan blades. Insert each blade into the designated slot on the motor housing and secure them using the provided screws. Ensure each blade is appropriately aligned and securely tightened.
Step 6: Installing the Light Kit (Optional)
If your fan has a light kit, you can install it now. Follow the instructions from the manual to attach the light kit to the bottom of the fan motor.
Hampton Bay Covington Ceiling Fan Manual
The Hampton Bay Covington Ceiling Fan manual offers comprehensive guidance on the proper installation and usage of the fan. For a successful and safe installation, it is important to carefully read the provided safety information before you begin the process.
Moreover, the manual covers necessary operational aspects of the fan. It includes instructions on adjusting the fan’s speed and blade direction, ensuring optimal comfort and air circulation. Additionally, the manual offers troubleshooting tips to address any common issues that may arise during the fan’s use.
We understand the importance of having all the necessary information at your fingertips, so we’ve provided the Covington ceiling fan manual below for your convenience.
By following the instructions in the manual, you can confidently install and operate your Hampton Bay Covington Ceiling Fan: