Most ceiling fans come with pull chain switches, you will have to replace the switch. However, every fan does not have it. Some Hampton Bay models may allow you to reattach the chain. Another important thing to consider is that does this switch controls the light or the fan? If you are changing a fan switch rather than that controls the light, you should learn: does the fan contain three speeds? Or does it have over 3 speeds or less? Most fans come with 3-speed levels, but if there is an exception, it is important information for you.
Here’s the step by step guide to know that:
- Whenever you do a maintenance of your existing Hampton Bay ceiling fan or any other appliance in your home, the first step is to turn off the power.
- Uncover the housing of the ceiling fan, so you can reach the switch. On the outside of the switch, loosen the nut on it which keeps it in place.
- Pull the switch out from the housing. Avoid touching the wires (do not disturb them or you will have to perform more work on it later).
- Check the switch. Can the chain be reconnected without moving further? If so, you are done.
- If not, then it is time to write the wiring color code. Also, check the terminal’s location where they are connected. Make wiring diagrams and also take a look at where all the wires connect. Use your camera or phone to take the pictures.
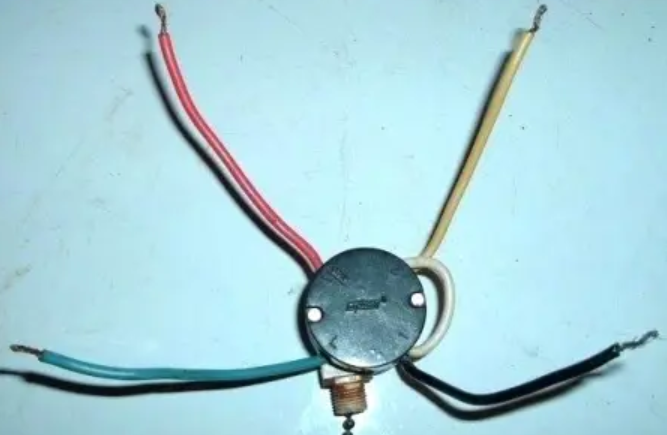
- Preserve the terminals while unplugging the wires. Remove the switch and note down the model and model of your fan. Write down that detail and take the switch along with it to a local retailer to get a replacement. Home Depot is main seller of Hampton Bay brand and its ceiling fans.
- The main points to learn about it is the number of speeds and the wattage of the switch when it comes to replacing the switch. That is the reason knowing the number of speed was essential. The new switch should be similar to the existing one.
- Install the new one. Use the pictures you took or wiring diagrams you made earlier to re-attach the wires to the terminals. After that tighten and attach the screws.
- Install the switch into the housing of the fan.
- Put back the housing cover or globe cover, whichever was there when you remove it in the start
- That is it. You have completed the job. Turn on the breaker again so the power can reach the fan once again.